
Intermediate level arduino & circuits - 1hr
Plants need water to keep alive, and I’m very bad at remembering to water them. It’d be good to have a Tweet to me when my plant needs a water!
A moisture meter is a device that you stick into the soil around the plant’s roots and it can ‘feel’ the water beside it by how much electric current passes between it’s prongs. Don’t worry too much about how it works at this stage, you can experiment sticking the meter in different things to see what happens.
You will need…
- An Arduino Uno (or likewise)
- A moisture sensor
- An A2D converter (comes with most moisture sensors)
- Three jumper leads (for Arduino)
Step Zero: Fire up Arduino code editor
Get out your Arduino Uno and plug it in to your computer, and boot up the Arduino code editor. You can use the online or normal app for programming, but we’re using the normal app version.
Step One: Connect up the moisture sensor to an Arduino
By default, the moisture sensor can give us an analogue reading from between it’s two prongs. An analogue signal reading is a variable voltage that changes as the moisture detected increases and decreases.
We provide the moisture meter with 3.3 Volts of electricity using our Arduino, and it can give us…
- 3.3 Volts back (if it detects 100% moisture, i.e. in a glass of water)
- 0 Volts (if it detects 0% moisture, i.e. in the air).
- Between 0V and 3.3V for a bit of moisture (using maths to work out how much!)
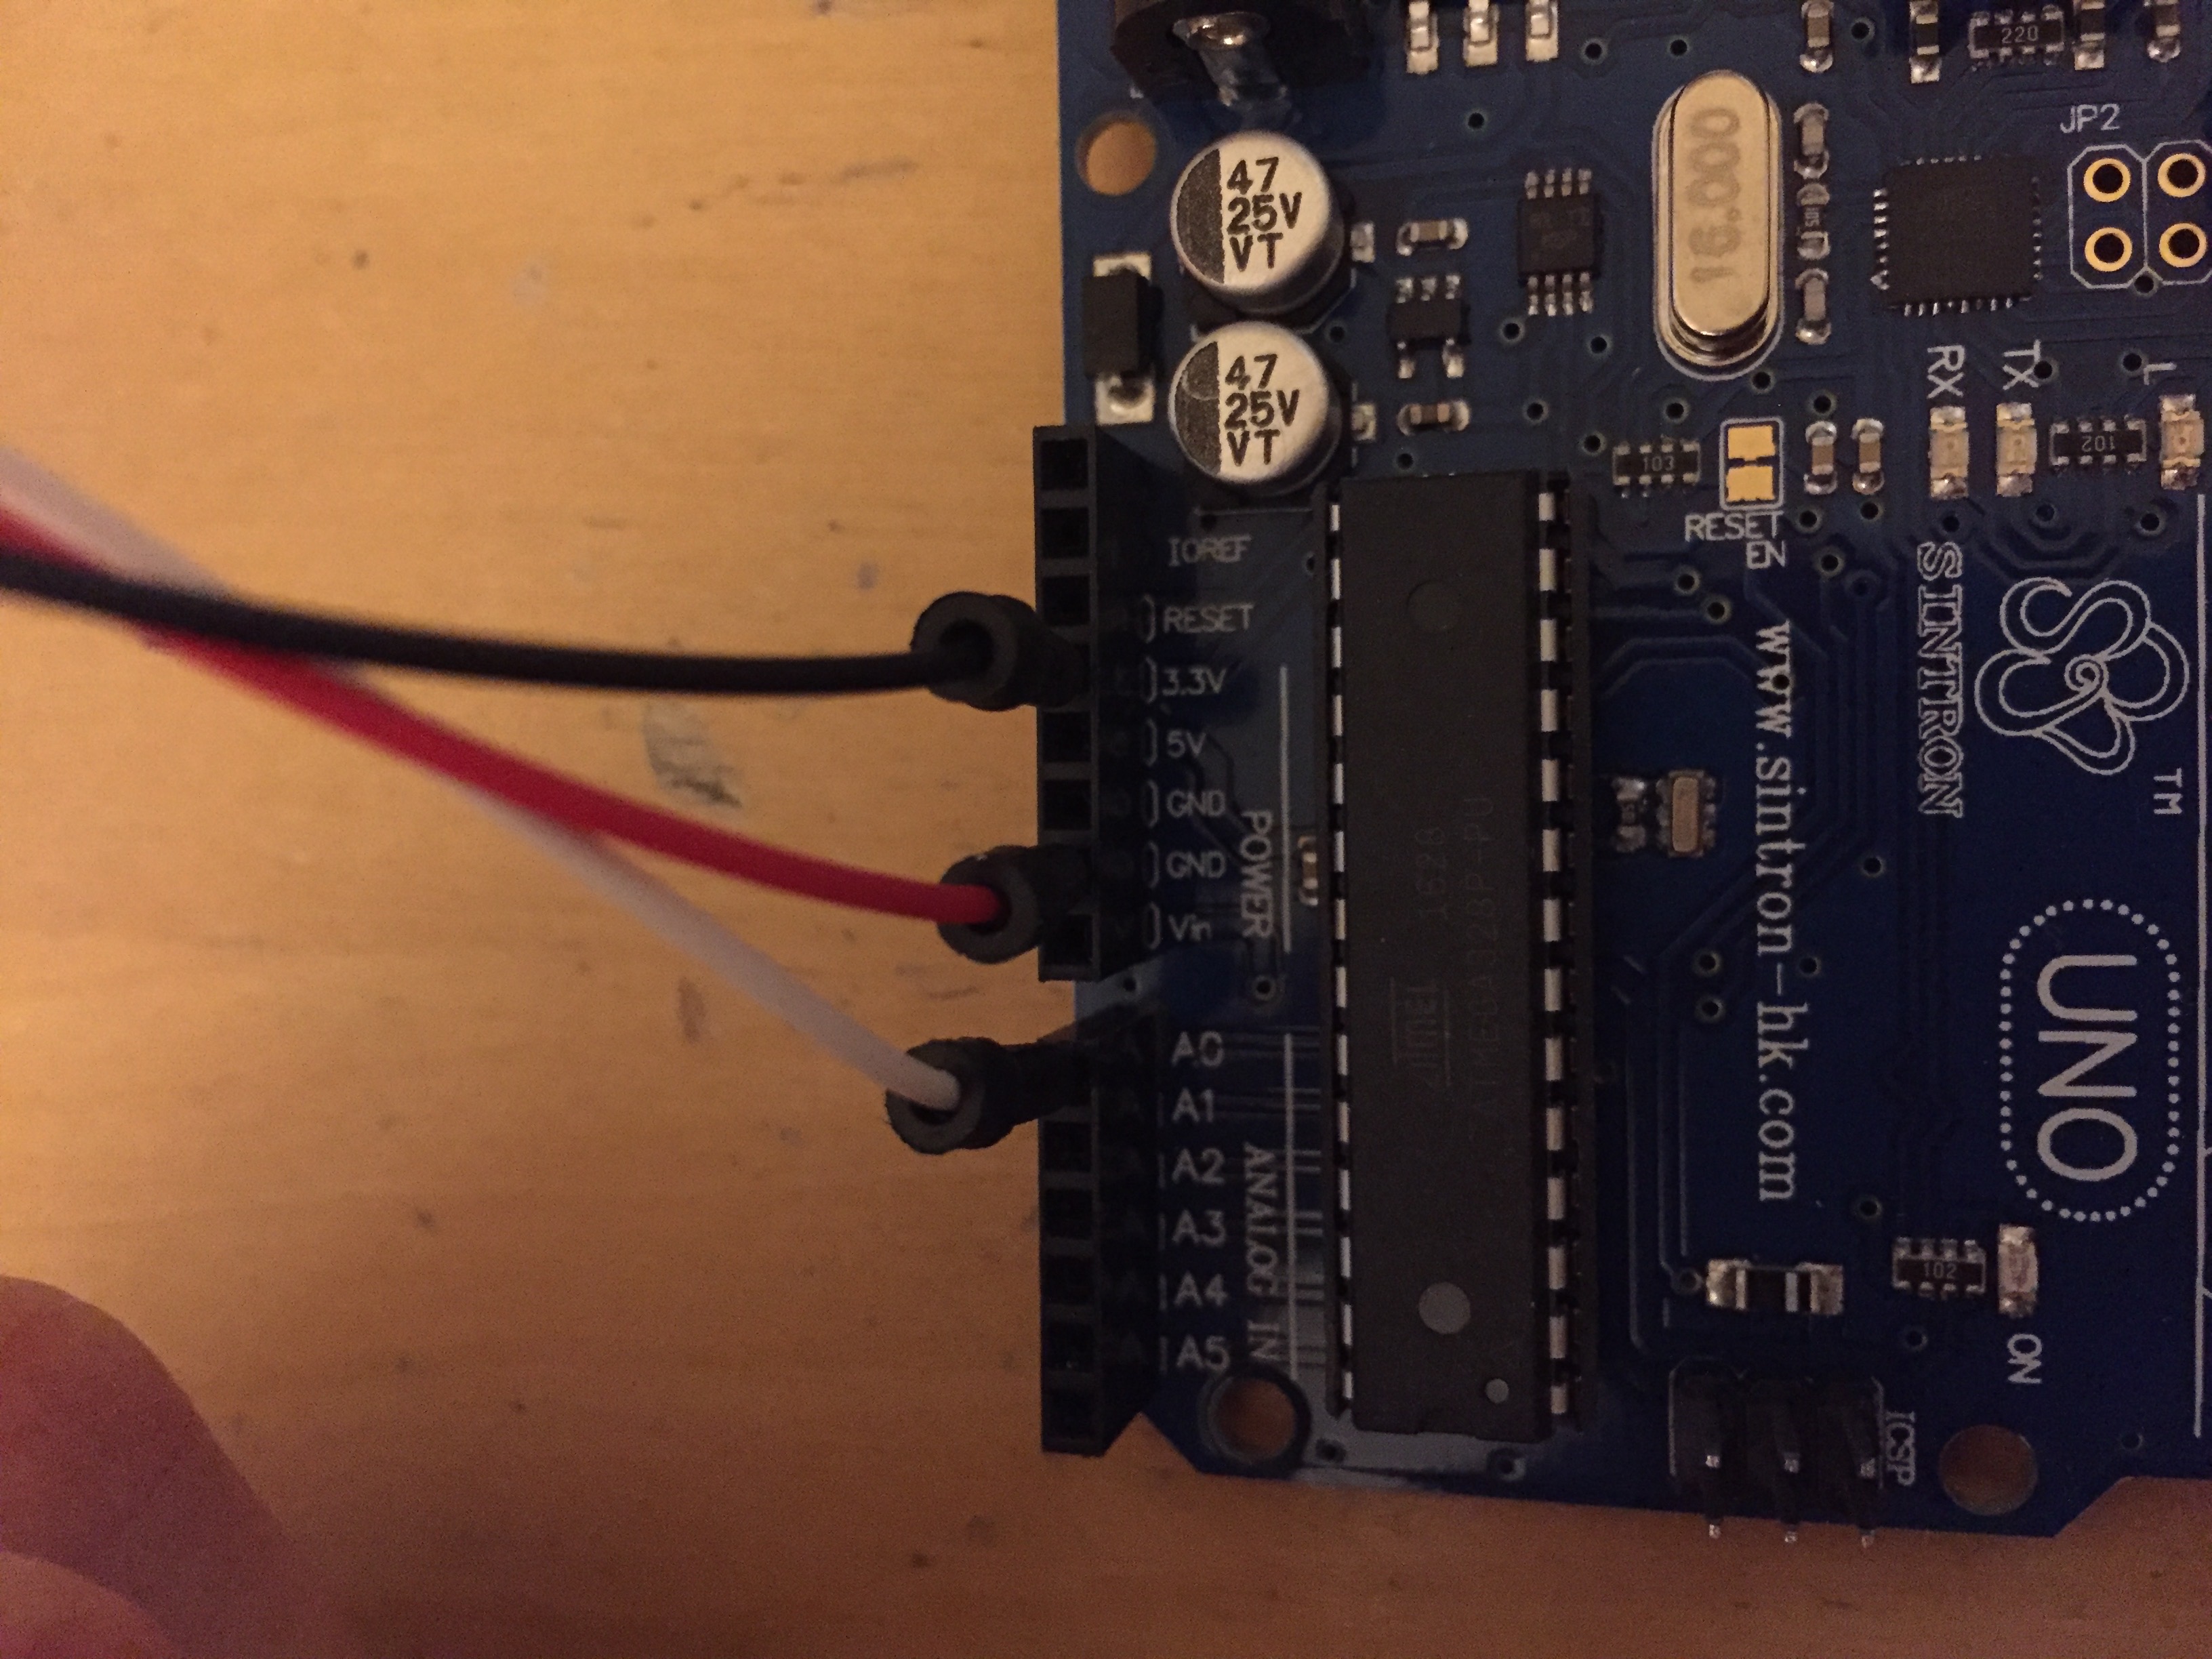
Connect up the Arduino to the moisture meter so we can read it’s signal back.
First connect leads to 3.3V pin, GND, and A0.
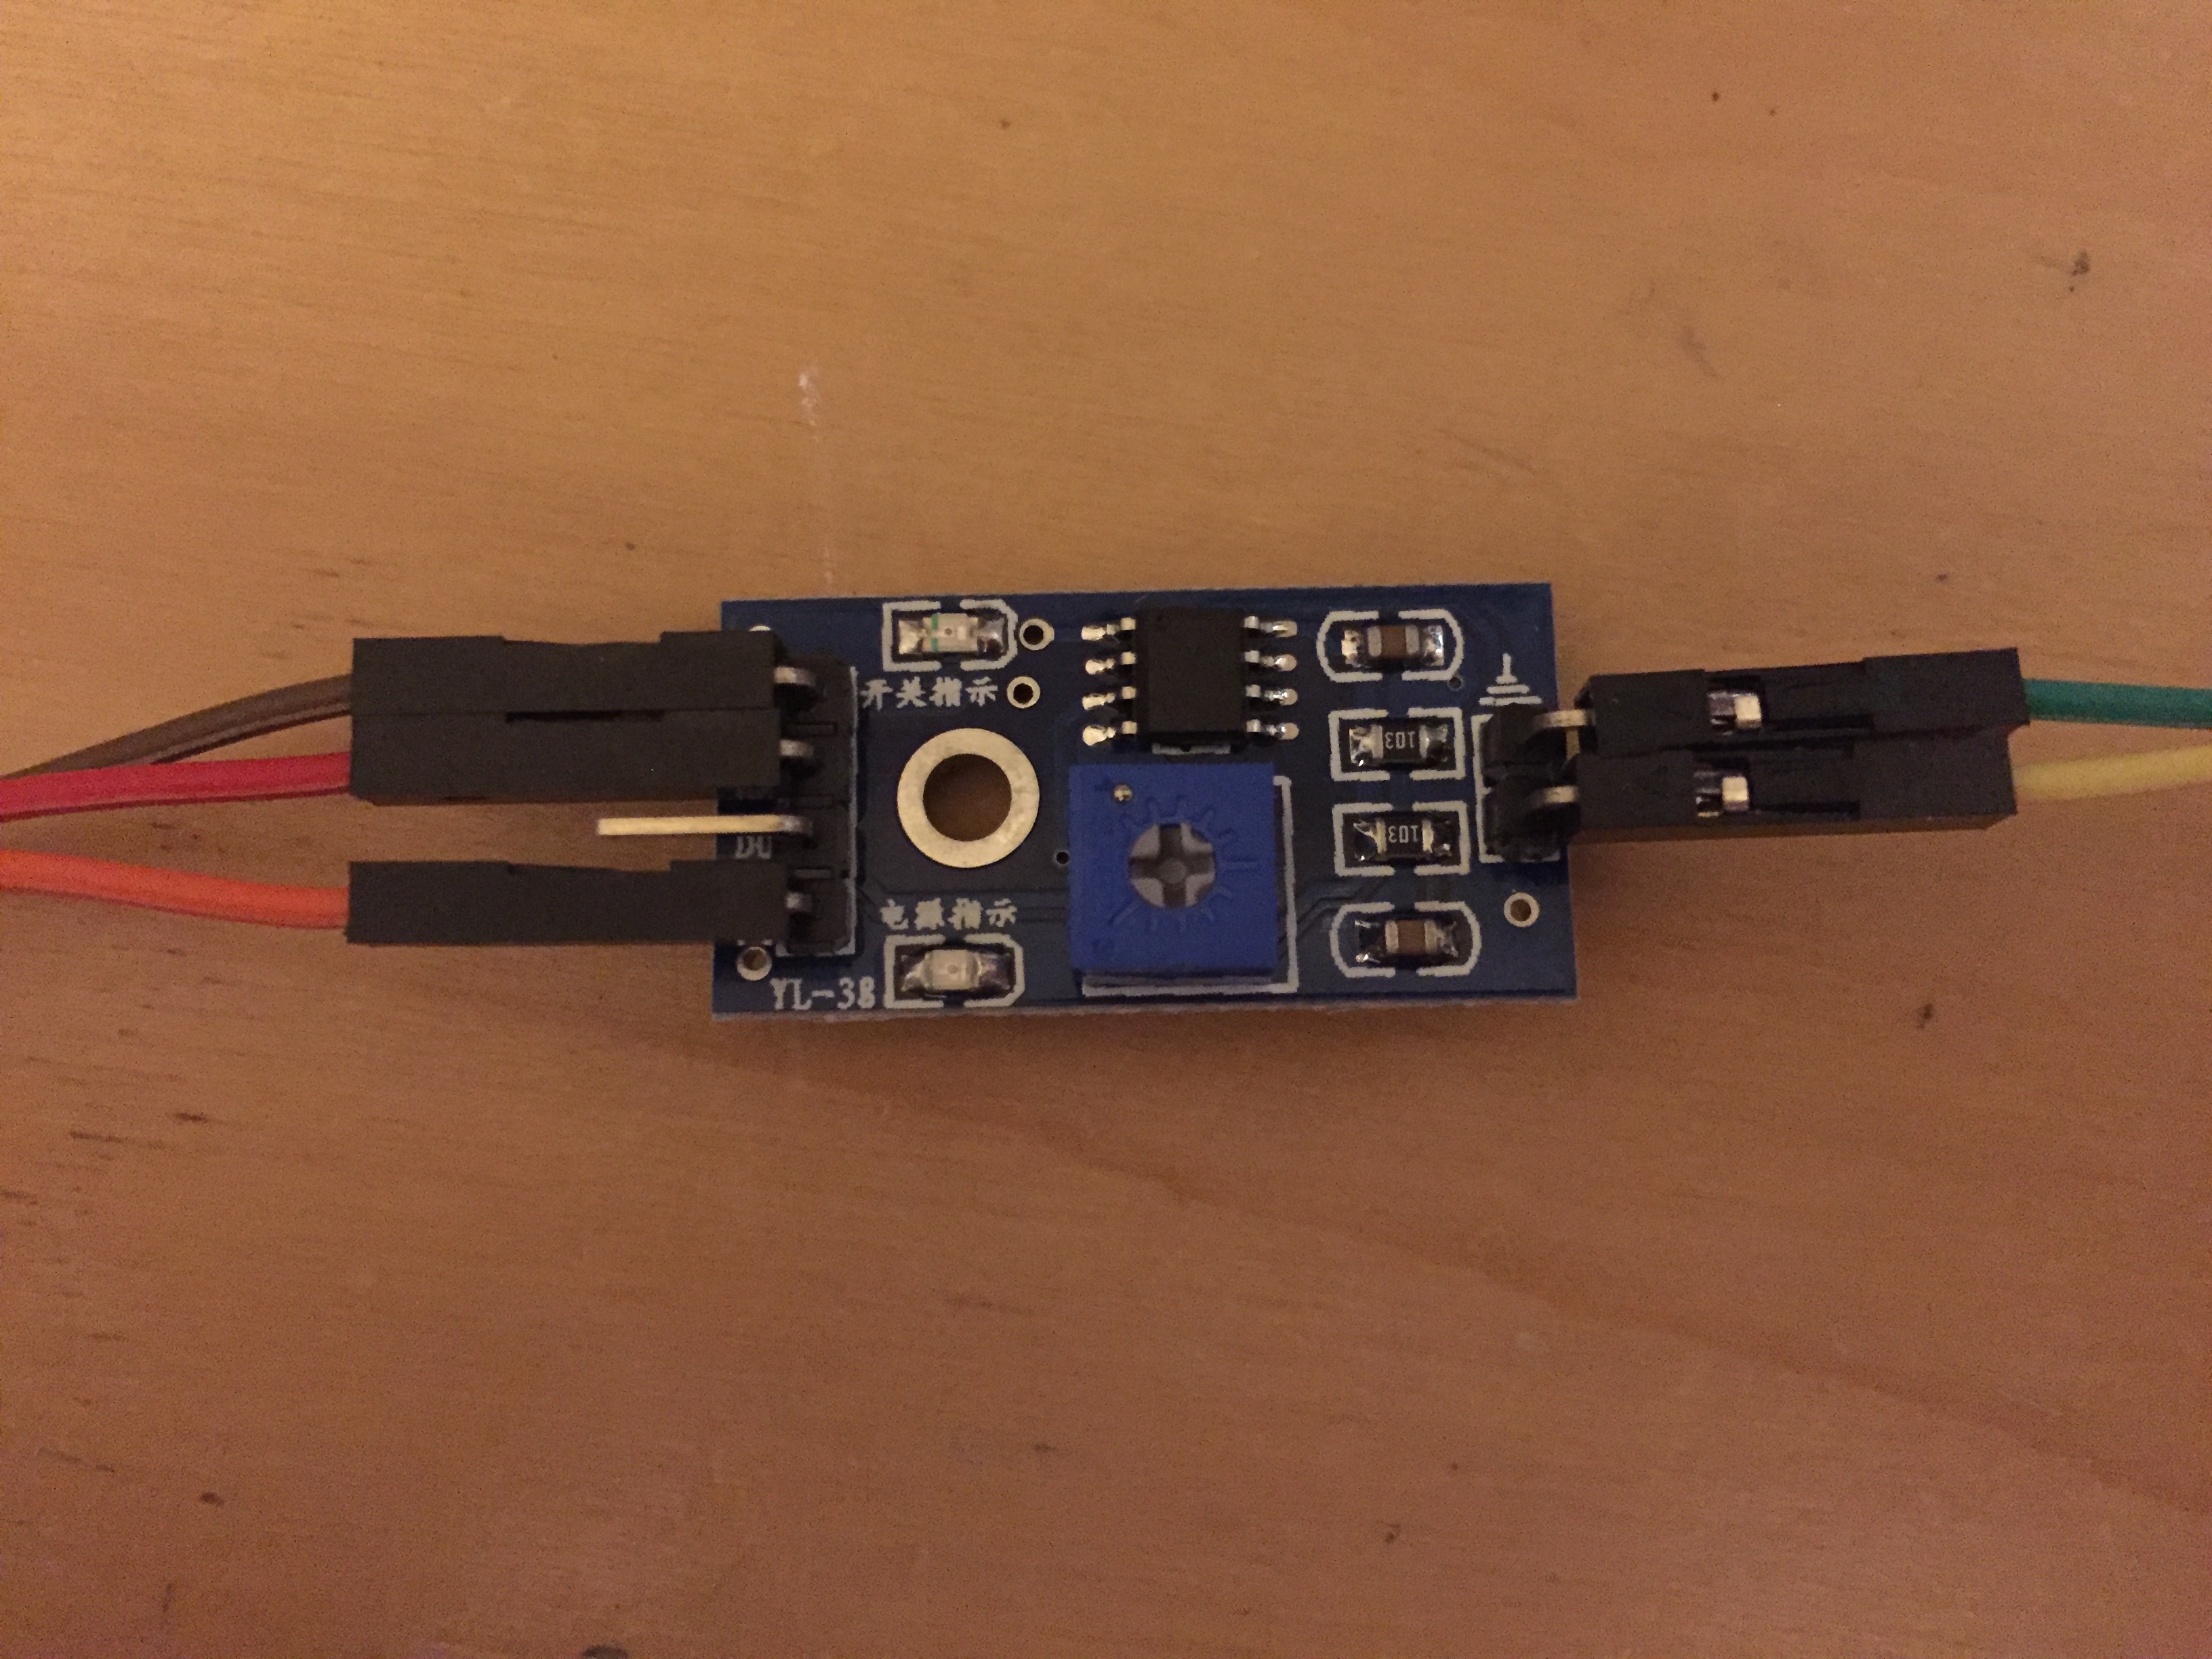
Now connect these leads to the A2D chip - this does the hard work converting the moisture sensor signal for us later. ‘A2D’ stands for ‘Analogue to Digital’.
- Connect
3.3Vwire toVCCon the A2D chip - Connect
GNDwire toGND - Connect
AOwire toA0
Connect the moisture sensor to the other two pins sticking out. It doesn’t matter which way around yet.
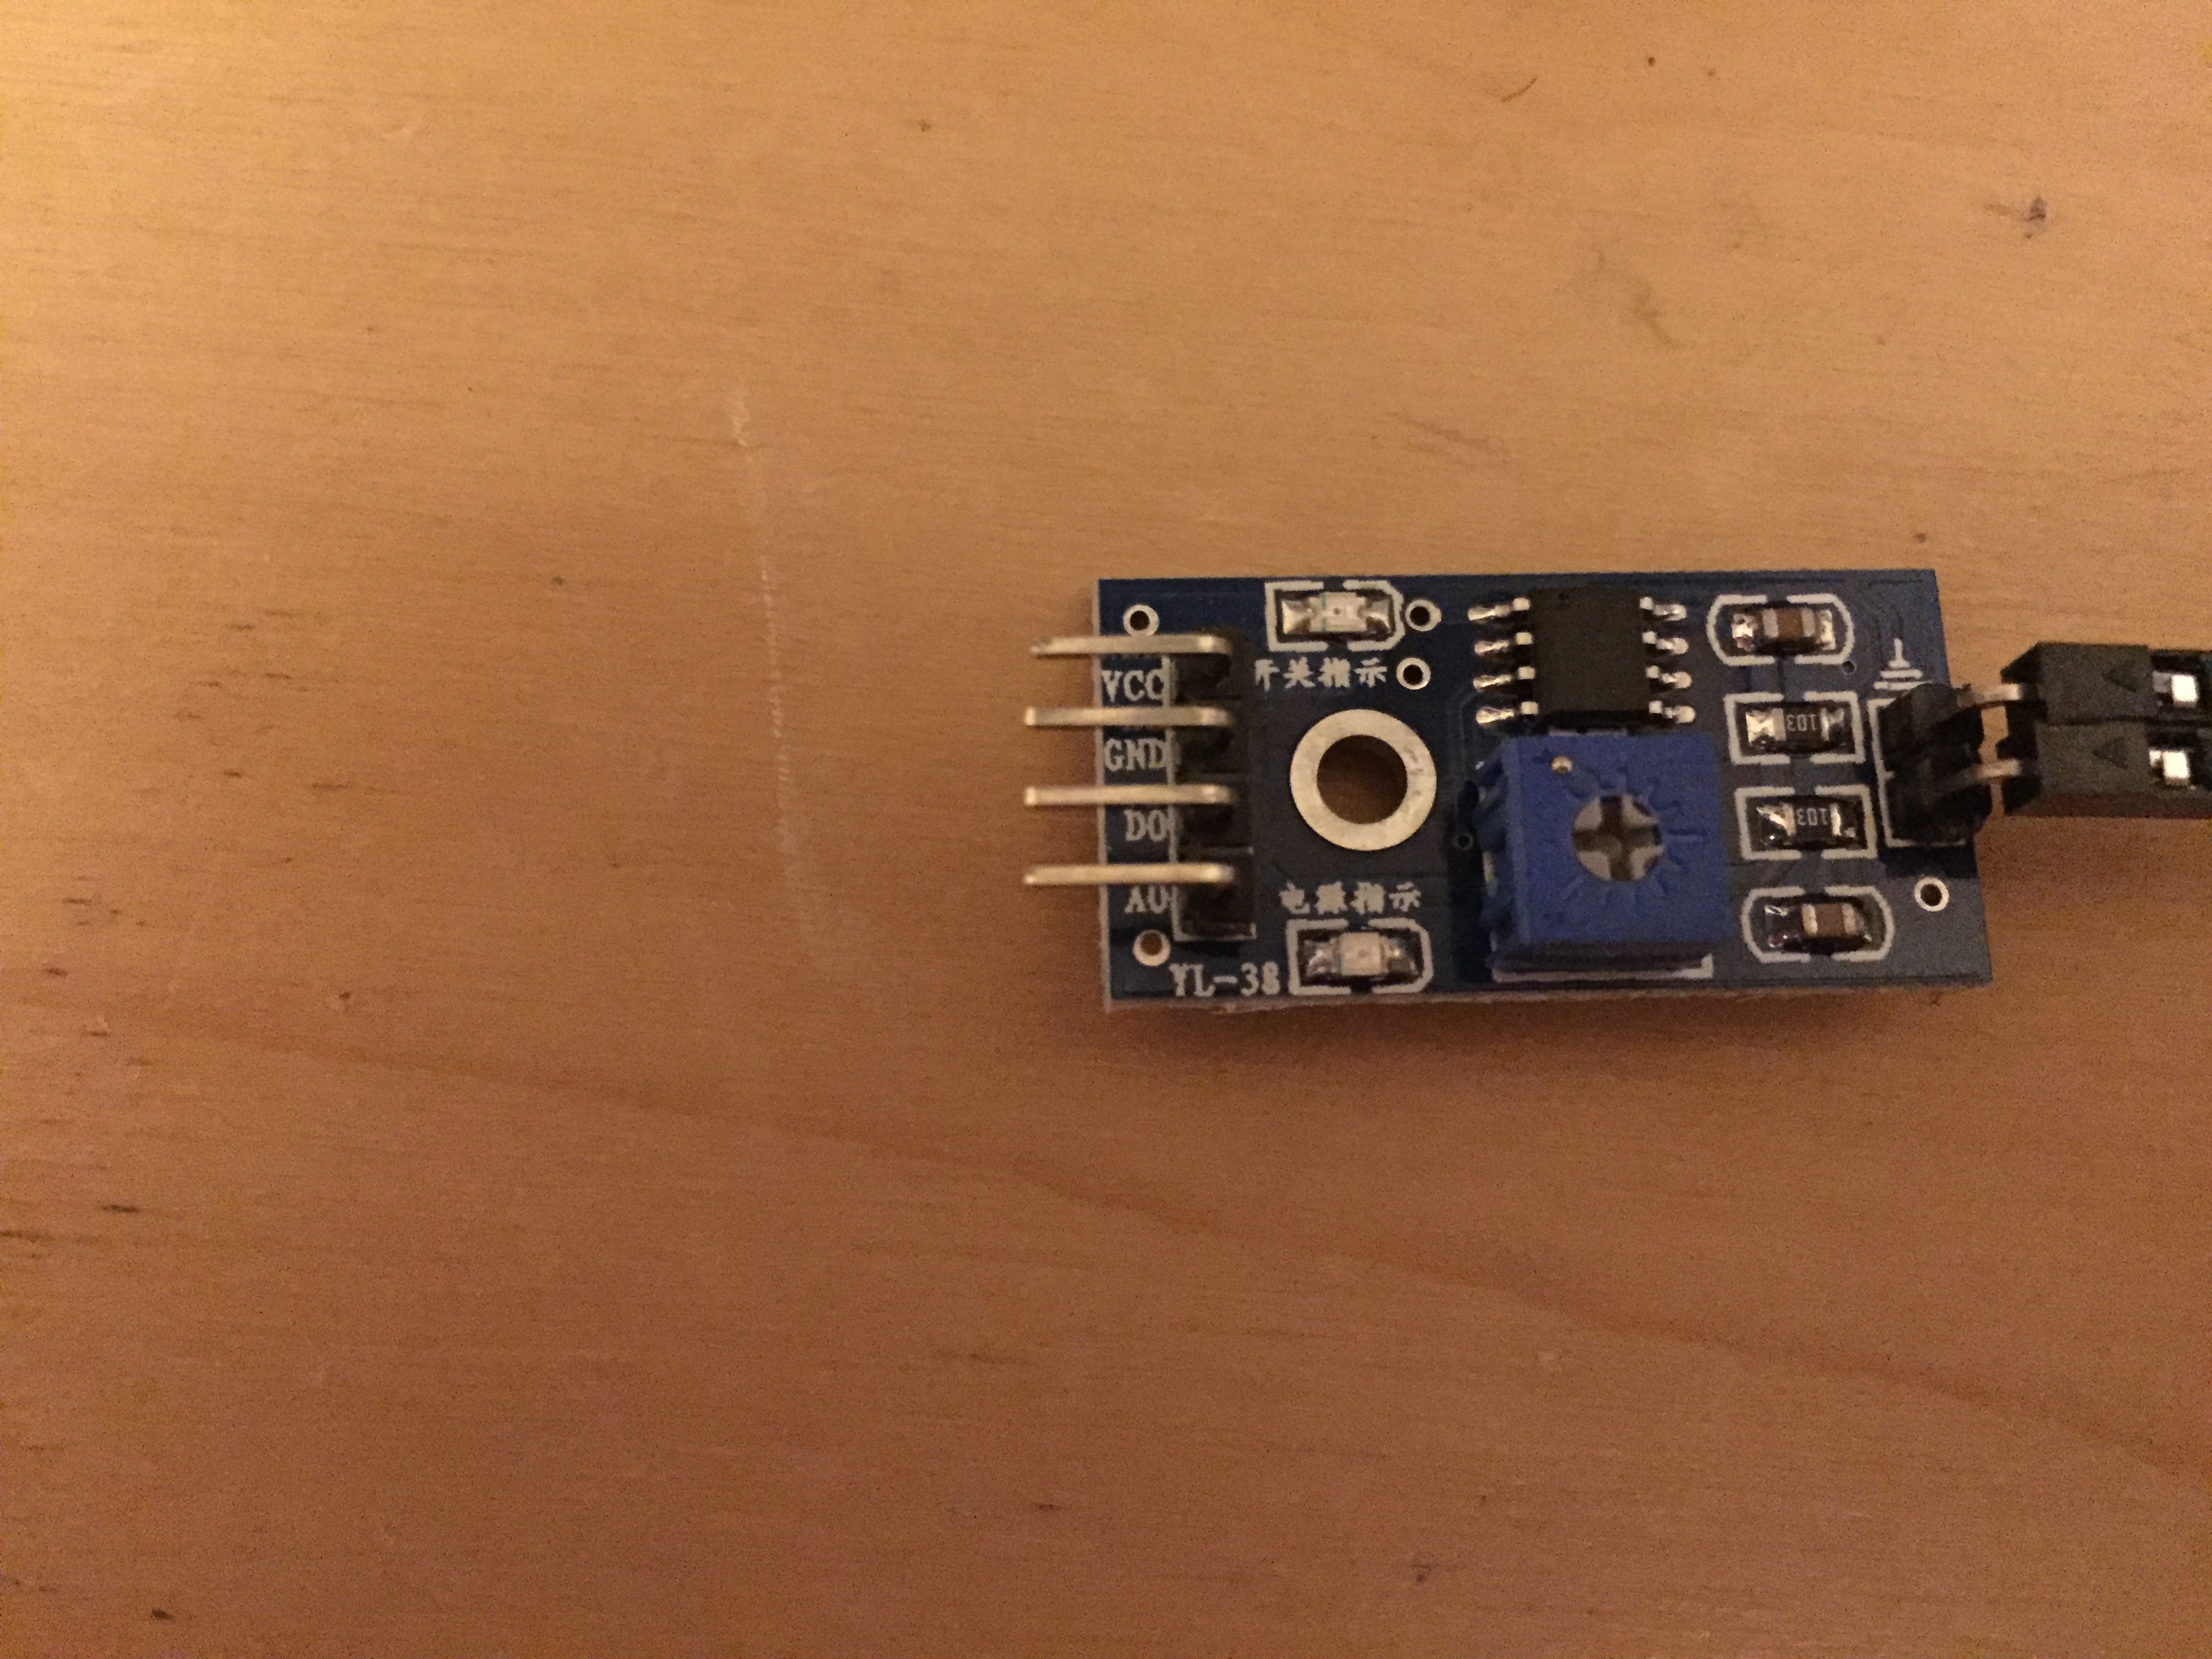
You can see the pins on the A2D chip better in this picture - the labels are hidden.
Step Two: Monitor the Arduino serial output
Plug in Arduino into your computer. In the Arduino code editor, find the ‘Serial Plotter’.
If you get a Board is not available error, change the ‘Port’ to the right value in the Tools menu of the code editor. If you can’t find it, then try a different USB cable or port.
You may need to change the Baud rate in the bottom right hand corner to 9600 (or whatever works).
You should now see a graph that’s moving from right to left and numbers that are plotting a live graph. This is the live analogue data coming from the moisture sensor and being read by the Arduino.
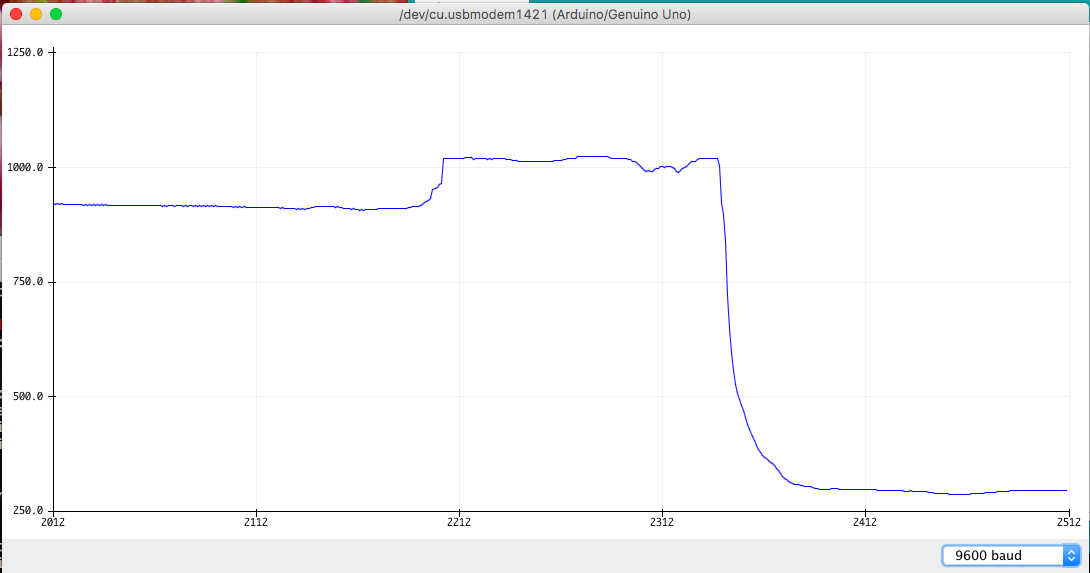
See what happens to the graph in fresh air, when you breathe warm air on it, and in water?
Your graph should start high up and dip down when ever you change how moist it is around the sensor.
Step Three: Arduino code
Now we’ve got the sensor working, let’s add a bit of code to do something when the moisture changes.
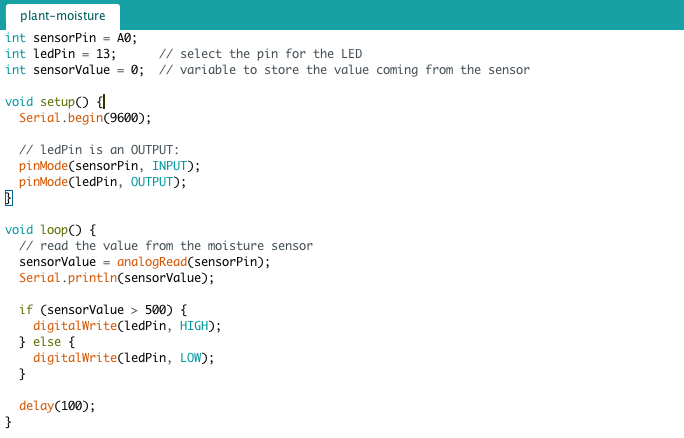
Save and upload the code to the Arduino. The onboard LED should light up when you are not in water, so perfect for detecting when the plant is dry!
Full code
You can get the Arduino code here
Challenge I: Flashing LED
Change the code so that the LED flashes faster and faster as more and more moisture is detected. A solid lit LED is only seen when in pure water. Make sure the LED doesn’t flash in open air.
Challenge II: Raspberry Pi tweeter!
The Raspberry Pi can only read digital signals. Change the wires from the A2D from A0 to D0. This will be on or off depending on whether the moisture passes a certain threshold (adjustable on the A2D itself).
Follow this guide from Raspberry Pi to setup a Twitter account for the plant. In your Python script, read the digital input from the moisture sensor and tweet every hour (or maybe every day!) saying if the plant needs more water. That way I’ll never kill my plants again!
 This arduino worksheet 'Plant Moisture' from CoderDojo York is licensed under a
Creative Commons Attribution-NonCommercial 4.0 International License.
No commercial use of our material is permitted